Teachers Guide to Creating Engaging Assignments on Google Classroom
Below is an infographic we created based on insights from Google Classroom Help page. The visual walks you through the eight steps to create, edit and share assignments with students in Google Classroom. Instructions included work on Google Classroom for the web, for those of you using iPad or Android, check out this page . Some of the things you will learn from this visual include: learn how to create an assignment, change an assignment due date or time, add materials to an assignment, post an assignment to multiple classes, control how students interact with an assignment, edit and delete an assignment.

1- Create an assignment
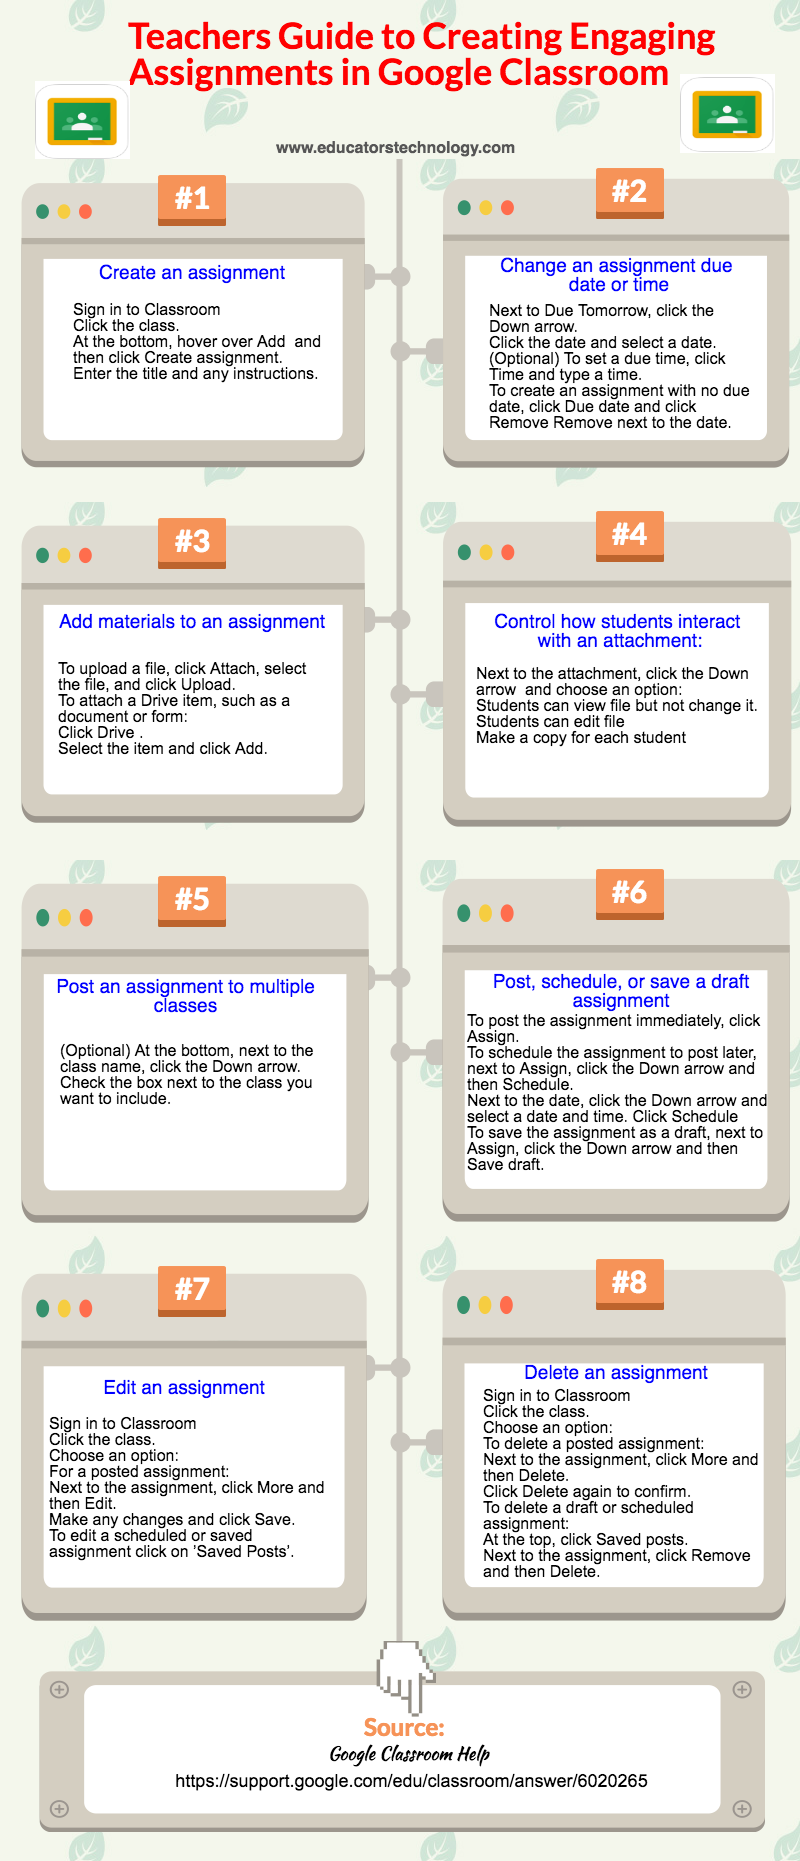
1- Create an assignment
- 'Sign in to Classroom
- Click the class.
- At the bottom, hover over Add and then click Create assignment.
- Enter the title and any instructions.'
- 'Next to Due Tomorrow, click the Down arrow .
- Click the date and select a date.
- (Optional) To set a due time, click Time and type a time.
- To create an assignment with no due date, click Due date and click Remove Remove next to the date.'
- 'To upload a file, click Attach Attach, select the file, and click Upload.
- To attach a Drive item, such as a document or form:
- Click Drive .
- Select the item and click Add.'
- 'Next to the attachment, click the Down arrow and choose an option:
- Students can view file—Students can read the file, but not change it.
- Students can edit file—Students can make changes to the file.
- Make a copy for each student—Students receive an individual copy of the file that they can change.'
- Optional) At the bottom, next to the class name, click the Down arrow.
- Check the box next to the class you want to include.
- To post the assignment immediately, click Assign.
- To schedule the assignment to post later, next to Assign, click the Down arrow and then Schedule.
- Next to the date, click the Down arrow and select a date and time.
- Click Schedule
- To save the assignment as a draft, next to Assign, click the Down arrow and then Save draft.
- Sign in to Classroom
- Click the class.
- Choose an option:
- For a posted assignment:
- Next to the assignment, click More More and then Edit.
- Make any changes and click Save.
- To edit a scheduled or saved assignment click on ’Saved Posts’.
- Sign in to Classroom
- Click the class.
- Choose an option:
- To delete a posted assignment:
- Next to the assignment, click More More and then Delete.
- Click Delete again to confirm.
- To delete a draft or scheduled assignment:
- At the top, click Saved posts.
- Next to the assignment, click Remove and then Delete.


No comments: